Hello fellow creators! I hope you like your new mosaic kit! Here’s a short outline of how to create yours…
In your kit, you’ll find everything you need to create your mosaic.
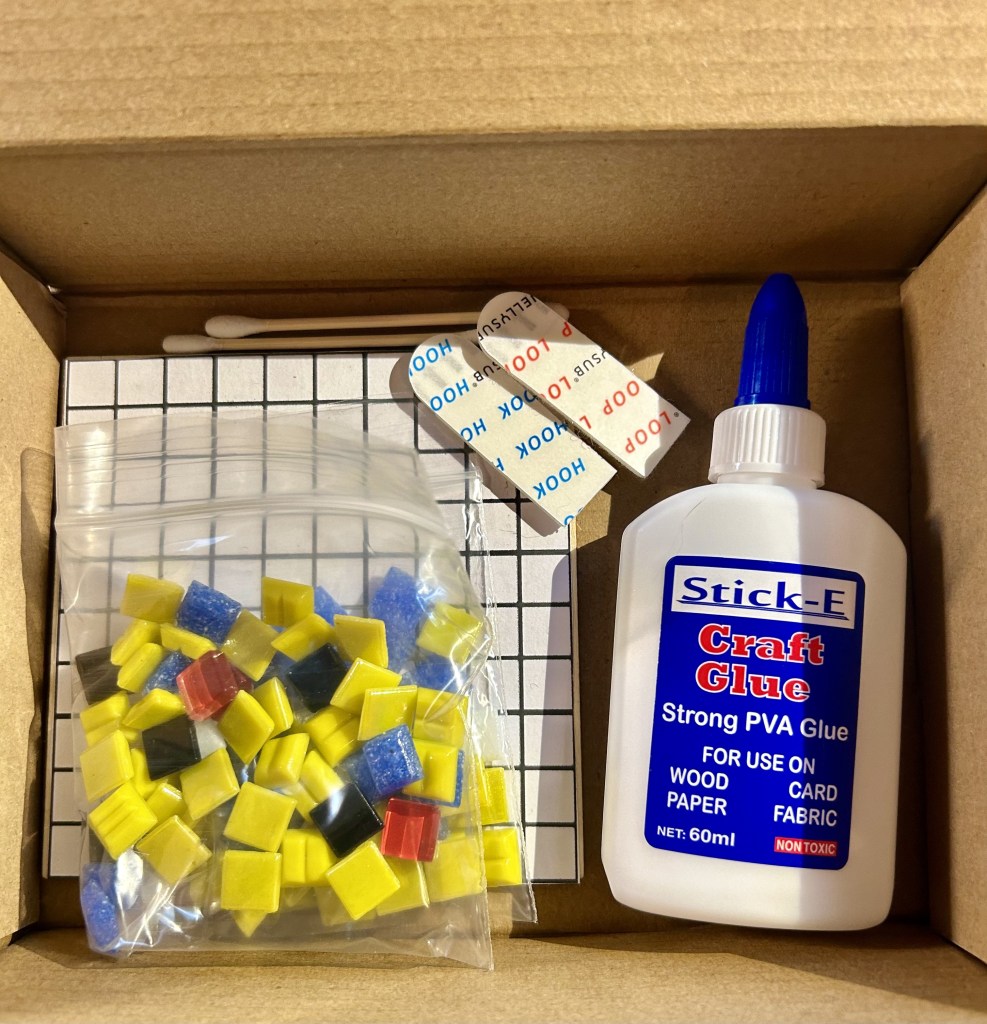
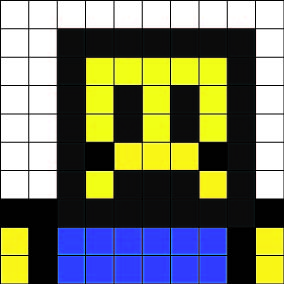
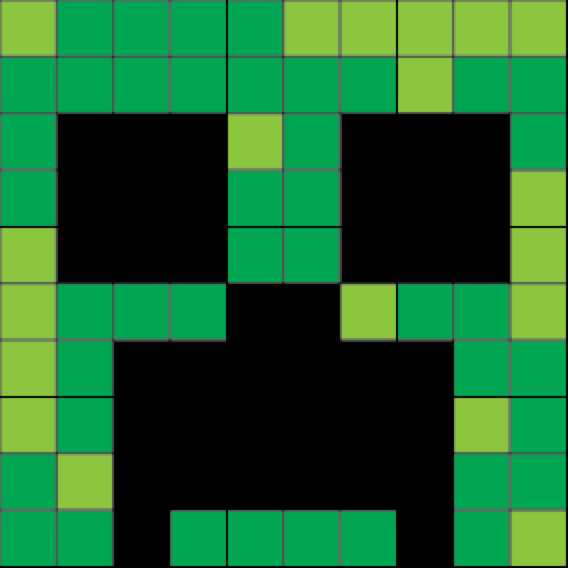
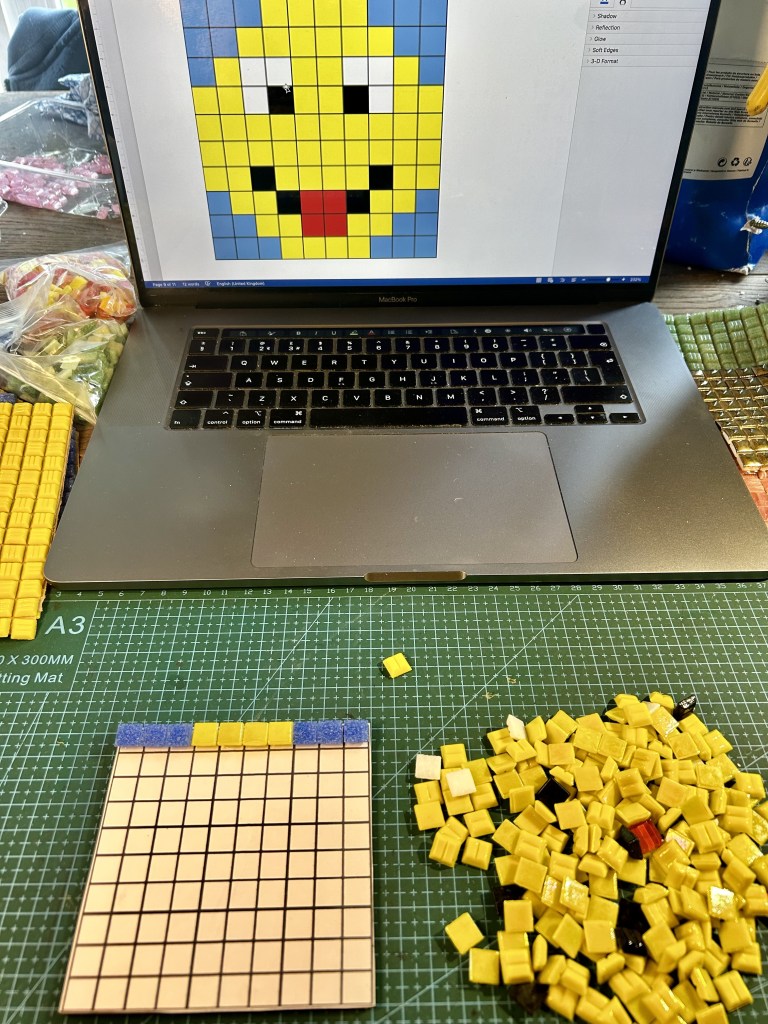
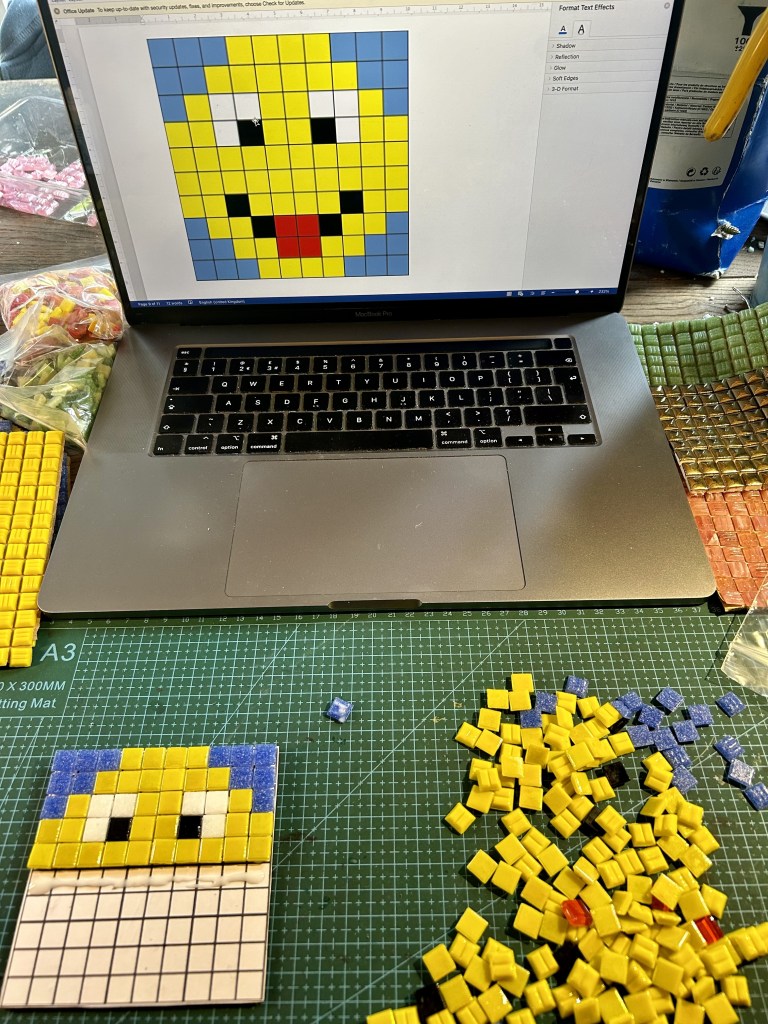
Remove the mosaic tiles from the bag, and open the glue. After you’ve read through these instructions, find the image of your mosaic below and put that on your screen while you work as a reference guide to placing your tiles.
You have the exact amount of tiles needed to create your design, so you need to follow the image of your mosaic to create it.
It’s best to work row by row, starting from the top. Run a line of glue along each row as you work. Place your tiles close to each other using the grid as a guide.


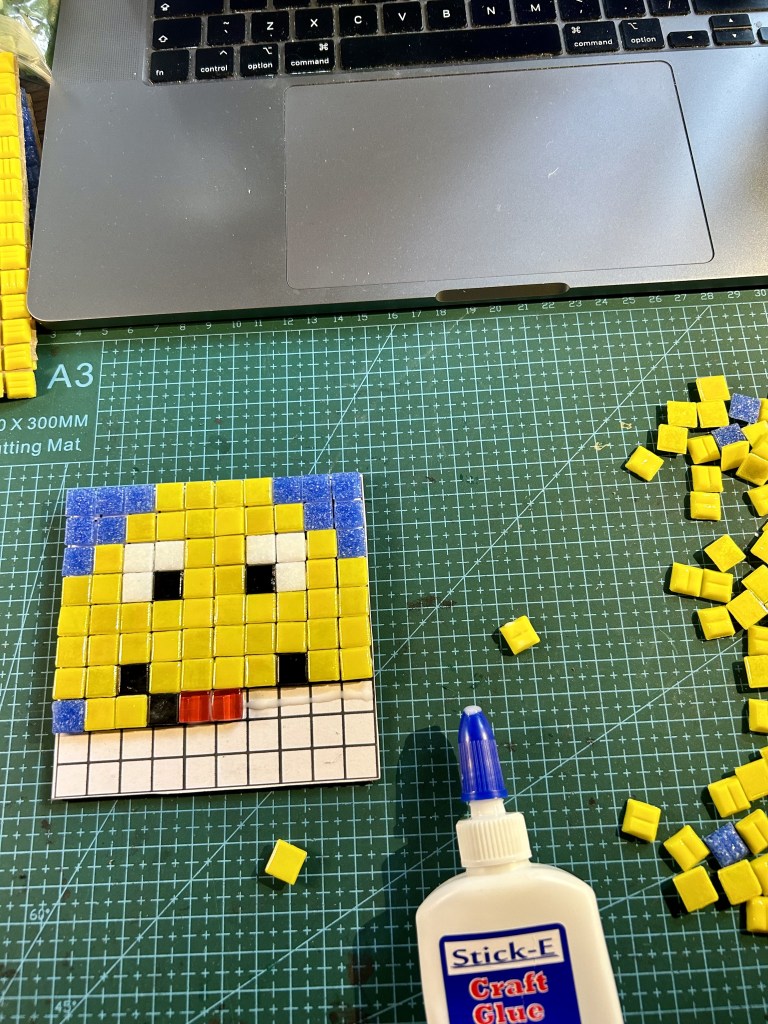
Continue this way until you complete your mosaic.
If you’d like to hang your mosaic, you can use the hanging strips supplied or attach a hanging device of your choice. You could even choose to get it framed. Here’s a guide to using the hanging strips supplied (you only need two – one each side – for your mosaic):
This is a fun, mosaic taster piece that is intended for display on a wall or in a frame of your choice. It’s not intended to be used as a coaster (although you might decide use it as such if you don’t get it too wet). Please don’t submerge it in water, as the tiles will fall off if you do. Should you need to clean it, give it a light wipe with a damp cloth on the surface of the tiles. If any tiles do fall off, it’s useful to keep the remainder of the glue and stick them back on. 🙂
Here are the picture guides for all the mosaic kits. Find yours and display it on screen while you work. (Please note that the colours below aren’t necessarily a direct match for the tile colours – they’re just a guide to show you the design.)
Happy mosaicking! 🙂